Showing posts with label Dark Angels. Show all posts

Wednesday, April 25, 2012

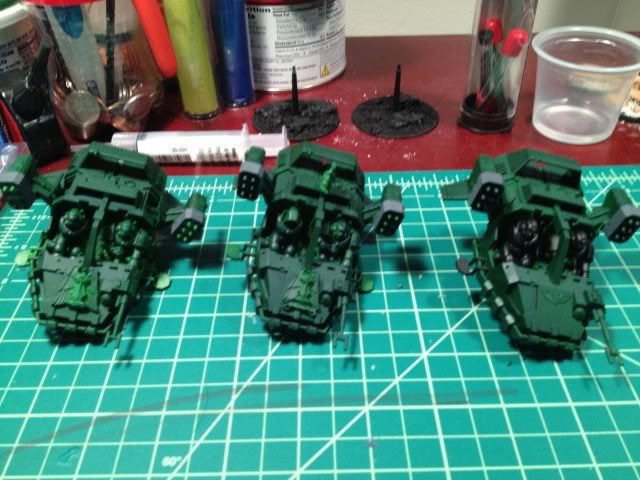
WIP Land Speeders Typhoon

After having these guys lying in the bottom of my to-do pile, I decided to use them for my airbrush practice. Don't get me wrong, they are still going to be a part of my army but I personally consider tanks or tanks equivalent are less punishing to the eyes when mistakes do happen. So, naturally, they will be the best place to start as practice goes.

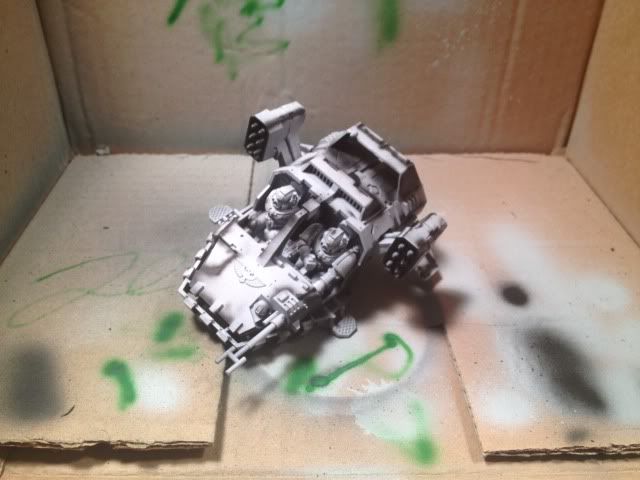
First off, after under coating, I played around with some pre-shading. At first, I thought it wouldn't be so hard and laugh about it. Seriously though, how hard can spraying black lines in areas you deem to have a shadow be? I learned that it is pretty hard if you don't fully understand what an airbrush can do or how to achieve a certain look, IE. hair line lines. 


First trial went as above. To be honest, this is actually the third one I tried doing this on and it is the best looking one, in terms of realistic shadow placement and over spray. My main problem, at first, was I did not release enough paint. I didn't know there was an option on the airbrush I got to control the amount of paint by turning its tail piece. Lesson number one learned, always spray on to something else like paper when you are learning how to airbrush.

Step two, base coating. Now I regret not buying more Dark Angel Green when I had the chance. I thought I had enough, plenty actually with a pot left but it turned out I had only a quarter, not even that!, left in the pot. Damn, I will have to find alternatives soon, IE Vallerjo Game Color? *wink**wink*

 
This is what I got so far. It has been a slow process since I had to learn everything step by step with no instruction and just trail and error sort of practice going on. Well, to me they came out alright.

Monday, April 16, 2012

Dark Angel Apothecary Part 2


I have been working slowly recently. The reason is just that I have more to do at the moment. I just wanted to make a quick post of updates.

Sunday, April 15, 2012

More robes

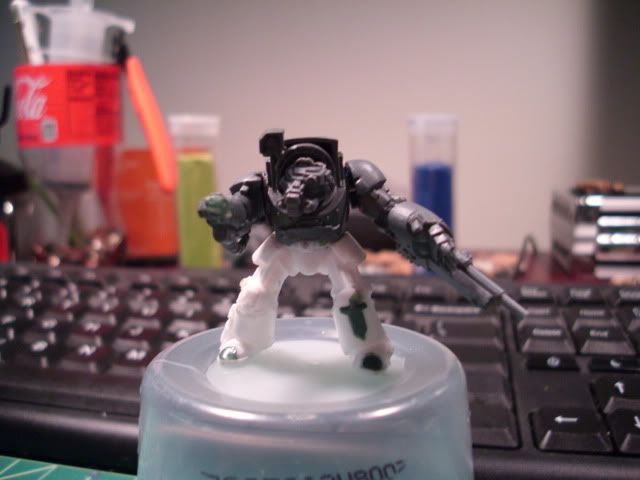
I never liked how my terminators looked in the robes I sculpted. Like I mentioned in my previous blog, they looked more like flax jackets then robes. So I decided to handle that by going through the process of striping the green stuff off of them with an X-acto knife. I ended up cutting their details off and shaving into their plastic and my fingers. I did this, not intentionally to my fingers, because I noticed with the extra material on them, their chests looked bigger as if they are fat people in suits so by shaving some plastic off, it will make the robes look like robes.


So here is the new robes I put on them. I am fairly satisfied with the outcome. The biggest change I made was actually using Vaseline instead of water as a smooth agent for my green stuff and trust me, vaseline makes a lot of different in terms of how smooth you can get it. Also, I added some back cloth on one of them. The reason I don't have them all four is because I re-sculpted that guy's front robes yesterday. So the green stuff has cured.

Friday, April 13, 2012

Dark Angel Apothecary

Image for Dakka Dakka
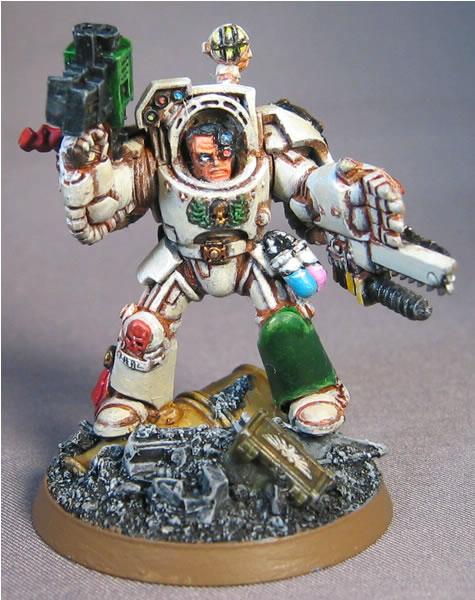
When I read the codex, I instantly knew I had to have one apothecary in Terminator armor. The down fall to this is the fact there is only known apothecary set for terminators and it is in the Grey Knight box. I did not want to order 50$ worth of stuff and had to convert all 5 armor, since the grey knights are unique in their markings. After doing some research on line, I figured out how the "whatever a apothecary carries" looks like, I set out to make it or make something that looked similar.

To the left is an one of the images of people's conversions, I decided to do something similar to this. The weapon, in my point of view, is a needle type mechanism connected to a life source juice. The apothecary will inject this juice into dying or wounded brothers which will repair what has been damaged.


Having said that, this is "the thing the apothecary carries" that I built from bits and pieces I had lying around. I will be posting a "how to" guide of how I made this. It was fairly simple and the bits I used everyone should have.

Thursday, April 12, 2012

Making of Bilial Part 5

Today I have finally completed all the sculpting work on Bilial.  I still need to wait for the final green stuff to cure and then I will have to clean him with some water and dish soap to get all the dust and yuck off his surface before I can paint him.

What do you guys think?

I had to change the pose from the basic concept since I messed up on the shield position.


Fully realize that his cape is not smooth at all. I wanted to go for a more raged looking cape then a perfect one.


So there he is, Bilial (pending a name change) Master of the Deathwing

Wednesday, April 11, 2012

Making of Bilial Part 4

Good news, my version of bilial is finally coming together nicely and is almost done. So far, I have sculpted on additional details on his cape and added more cloth on his waist. The only thing, or among a bit here and there, I need to do is attach his arms, head, and sculpt in some soft armor and he is finished.

Good timing as well, since my airbrush has arrived and paint is on the way. Soon, my Bilial will stand strong!!

Here are some pictures of what I done. Even though these updates are small, boy it sure took a long time making each sculpt.


Monday, April 9, 2012

Making of Bilial Part 3

I wanted to change the look on his cape so I started out from the beginning by redoing the structure. The main reason why I wanted to change it is because the original structure made the cape look unnatural. The strange shape just stabbed out whenever I look at him and that is not good in terms of painting it. To make a good paint or even just a decent one, the sculpt has to at least be decent. By adding another rod to the structure, it gave me the look I was going for, 4 folds in the cape. Plus, I bended the outer rods to make the cape look more wavy and more natural and I wanted the cape to look more like a "Batman" sort of cape where the end is wider than the beginning. Personally, I find it cool to look at. The hardest part was creating a bent structure that was even in length. Even though I did not get it perfectly equal, it will look just fine or at least, that is how I picture it in my head.


After rolling up some green stuff to make it as thin as possible while maintaining its strength and adhesiveness, I managed to complete it. I still need to sculpt in some final details where the cape meets his body and at the end of the cape but over all, I think it went every well and came out just the way I wanted it to.


The only bad thing that came out of this was I will need to repose him. The cape span and his shoulder pad can not meet since I do not want that to happen. Instead of a charging position, I decided to go for sort of like a "Bring it on" type of pose. This will be achieved by posing both of his arms in an opened position. They will bend back towards the back. He will look something like the picture.

The robes of horror (to my mind)

After I gotten myself together and focused on the tasks I had scheduled up in my head, I finally came around to do some green stuff work on my Terminators. The process begun with me researching over the net for various tutorials and I did find many helpful tips and tricks but in the end, I went in with my own "image" of how robes were sculpted. The results are the picture to the right. Yes, they look strange and totally not like robes. Having seen what horror I have made upon my terminators, I knew these robes will never work and if I stick with them, the painting will be equally as horrific. During the waiting period, I went back to the drawing board and back to my vault of tutorials. I decided I will make my robes simple, not the complexed ones I sort out to do.

This is what I got. Yes, they still don't really look like robes but more like flax jackets. Well, maybe they do look like robes but my high expectation of my skills just make anything I do look bad. Working with green stuff is hard and is the part of the hobby where I both love and hate. The fact that I have gotten this far in terms of scuplting skills has already impressed me. I am normally more of a quitter if things get too hard. Anyways, this is what I got so far. Maybe by adding some rope for belts and some loin cloths will make these terminators look more robes than jackets.

Sunday, April 8, 2012

The boys are up and running

Today I came to my peace with the fact I will not be making all of my Deathwing individually unique in terms of poses and equipment. There was too much work involved in them and I did not want to do all of it. Plus, I need to start thinking about how to paint these guys and GW changing their line does not help with that. Anyways, I started working on the boxes I had since a month and a half ago. Basic cutting here and there, gluing this and that together, filing a bit where needed and I got myself two squads of Deathwing ready to be painted. At first I was really reluctant to put on the shields since it will be blocking 80% of the model from direct or at a good angle from a brush. In the end, I gave in to my inner self of laziness and just slapped them on. I painted them like this before and I believe 90% of people paint them like this, so who cares at this point!


However, I am looking to switch permanently to Vallerjo since I already ordered an airbrush and its whole nine yards. I am not sure how the new paints from GW will react to an airbrush. I will let someone with time and money to burn do that review. I am looking forward to getting my order since it is the biggest package I will be receiving since I have been here, both in terms of size and price (minus my computer of course) Also, if you ever had or planned to buy an airbrush you will know that Vallerjo has one of the best paint lines to use directly with it. They have hundreds upon hundreds of paint pots to choose from as well as any additional "technical" pots you may need such as retarders and thinners. So I may be looking to getting my hands on some when the life of my current GW pots die out.


Last thing for today, I tried to work out Bilial's cape and failed miserably. Luckily $10 of greenstuff will last you a life time and screw ups are normal for beginner sculptors. Yet, I wanted to show what he looks like so far, but I did not see a point of creating a separate Bilial blog entry.

Friday, April 6, 2012

Making of Bilial Part 2


I just got back from Boston yesterday. So I may not have a lot of updates for this entry. Before I left I managed to string a couple of pieces of wire together intended to be the frame for this cape. I may change the design a bit this week though since three folds in a cape sounds wrong for some reason. Again the technique I am using for building the cape is from The Fortress of the Unforgiven. I can't emphasize more of how helpful their tutorials are.


Before making the cape frame, I wanted to add some more detail to his back area. Since I already sculpted on cloth/robes to his chest region, I wanted it to continue to the back.

I was not as worried about the level of details here since the majority of it will be cover or block from sight from the cape I will be putting on him. Therefore, as you can see, the robes on his back are like they are. Well, at least I did manage to make them look convincing enough in my point of view. Again on The Fortress of the Unforgiven site, you can find numerous tricks and tips on creating robes or just search the popular forums for them. There are plenty on the net.

After I got back, I found that one of my packages has arrived. This order was made from Scibor which is one of the best makers of custom resin pieces and models on the net today. I wanted to add some originality to my Dark Angel chapter with some easy conversions, piece swaps. Here are what I order and how it looks on my Bilial model. (pictures of the actual pieces on bilial will be updated later)


Thursday, March 29, 2012

Making of Bilial Part 1

I went through the codex and checked several websties about Dark Angel list making and who to choose as a HQ. After reading, I decided to go with Bilial. You are probably saying "No S*%T Sherlock!" and I don't blame you. He is probably the most over used HQ choice, period! Yet, because of the limitation of an old book, he is probably the only viable choice. Well, the biker dude is pretty cool and useful but I don't have the cash or the mind set to tackle a large fine cast model and when I do, I will be certain to take as many pictures and videos of what poor quality, or good, I receive.

Enough talking for now, here are some pictures for "The Making of Bilial" Blog

Firstly, I had to gather the pieces. Now these are not all of what I am planning to use. I still have some parts in the mail, when it will get here, I have no idea.The parts I gathered so far are basic parts from your normal Terminator Assault box. I got a Thunder Hammer, shield arm, legs, torso, and head. I decided not to use a helmet since in the Codex picture, Bilial isn't wearing one and I decided to use a bald head because, again, in the picture he doesn't have hair but I might add some though. It depends on how adventurous I want to be since the last time I attempted to sculpt hair did not end so well.

Secondly, I adjusted the legs by doing some repositioning by pining as well adding some cork to the base. Pretty standard stuff so far and I am pleased with the results.
I decided to pose him this way because I wanted him to look like he is charging over some rocks with his shield in a "Get the F**K out of the way" position and his hammer ready to bash some alien or heretic scum.

Thirdly, after getting the pose I wanted, I started with the repositioning of the legs. I sawed the leg into four main pieces and re assembled them using the pinning technique. You can find how to do this in plenty of places, but you can go here, Various Tutorials.
The conversion was basic but it did take a lot of planning and cutting. So if you want to try something like this, make sure you have the proper tools and protection. It isn't worth it to lose a finger!


Fourthly, after the glue dried and all of the pins were secured in to place, as well as there was not movement in the pieces, I added some green stuff on to the model.
This was probably the hardest part so far since I never sculpted whole terminator legs or feet before and the results, well, are not as I planned. However, I do have plenty of ideas on how to fix it. For now, I needed the frame to be secure so the level of quality will do for now. 


Lastly, I wanted to add some character into the model so he really stood out from other marines and can fully call himself "Master of the Deathwing".
So naturally, I added some robes/cloak/cape thing on his chest. This will continue to his back as well but not blocking the vents in his armor. Also, I am going to add more robes hanging from his belt and add robes along his body. Maybe I will use this to block the hideous leg I sculpted. I am not sure yet.
To conclude the look, I am planning to add a cape by using inspiration from The Fortress of Unforgiven. I stumbled upon this site late one night and was immediately impressed with the numbers of Dark Angel related articles and tutorials they had. It is a shame that this web site has not been updated or touched by the moderators or owners since 2007. So most of the models on their site are mostly old school, which for some is a treat but not for me really. I prefer the newer sculpts from Games-Workshop. The old ones just look weird!
Final thoughts, I really recommend anyone to get some professional or proper wax carvers. I have been sculpting for over two years and just recently invested in some proper tools. They make a lot of different in terms of ease of execution in what you have in mind as well as putty manipulation.

What do you guys think of him so far?
Sunday, March 25, 2012

Dark Angel Progress!!!

Welcome to my WIP blog, I will be updating it whenever I can will everything I have been doing. Today, the orders from Games workshop finally came and I have gotten all of the other pieces as well. I am still waiting for Scibor's stuff but anyways, here are some pictures of what I have been doing today.

Introducing my Reaper Angels,

Color Scheme
Posted Image

Work Station 2.0 in the US
Posted Image

The Load
Posted Image

The Cheerleader
Posted Image

The progress
Posted Image Posted Image

I also have some special projects that I can not show yet. My latest experiment was a failure and ended up wasting $20 in the process

Monday, March 19, 2012

Decided on an Army and preview!!


After much deliberation, I have decided to change my production's logo to the current one on the left. This one done for only one reason, I accidentally forgot to bring/transfer my original logo from my hard drive from on old computer.

I actually like the new one I created. It looks professional and clean unlike my previous one.

If you read my previous blog entry, you will know why I have a green terminator in this post. Yes, I have finally decided to turn my back on Dark Eldar and return to the Imperium. I decided to go with a black and green Deathwing army. I am aware the traditional colors of such an army is bone white but I like to create my own army's history and not just take it out of the codex. 

My Dark Angel army is called "Reaper Angels". They are a hidden faction within the dark angel army unknown to the outside world and only to the most loyal of all dark angels. Their wear a black helm to honor their fallen comrades in battle and their main duty is to be executioners on the battle field. I am not just talking about the Fallen here. They believe in justice and are known for their lack of mercy towards the enemies of the Emperor.

I actually have a Company Logo in my head. Basically it is a Death Reaper or just its scythe with wings on each side. Fairly simple to paint/make and should look cool enough on my models. I will give more updates on my army when it gets here.

Monday, March 12, 2012

New Life in the USA

Greeting to the people who still look through my blog, it has been a long while since I updated it. The move to the states was smooth but the times are getting tough. My real life obligations have altered the way of my war gaming life style to the point where I have no time to do so.

I have not given up! I shall prevail with my armies intact!!

But.......

I have been thinking more about my dark eldar. Yes, they have a relatively new codex when compared to others and they are a good looking, fun to play army. However, the concept of "Glass Cannon" does not really suit my style. I like something that is tough as hell and will bring anything down. The concept of walking slowly across the battle field, getting shot at by everything, and still can laugh about it is really my way of doing things. Sadly, the move tied my hands in the sale of my space wolves and I do not want to travel down memory lane by purchasing them again for the second time.

I have been reading the Dark Angel Codex and studying their ways. I don't quite get what makes them unique. The concept of building a Deathwing or Ravenwing army does not convinced me of how unique they are. Their rules are sort of strange where most units are fearless but that's it. Too bad because I was seriously thinking of getting into the dark angels and turning my head back to the Imperium. However, since the hints and rumors coming from various blogs, sites, and etc the Dark Angels will be getting their update ahead of the Tau. Insert sad and angry face here.

It will all come down to they new rules update and what their models look like. If GW do update every aspect of the Dark Angels like they did with the Dark Eldars, surely we can be expecting some kick ass looking miniatures (even though they will surely be in fine (fail) cast). I am pretty excited about what the new models may look like or how the codex will be updated.

For now, the Dark Angels seem to be a classic army filled with character but only in print. On the gaming board, they are just another marine army with the option of going full terminator armor or bikes. Nothing special in my eyes.

Hopefully they will be updated, and again unique!